This guide is meant to guide and give suggestions as to how to setup and configure the Hadoop installation once you have completed the RPM installation instructions found here: Infinit.e-hadoop-installer.
Log in
This guide will start off from the point which you navigate to http://server:7180 in your browser:
...
Once logged in skip the prompts to upgrade and register and you should come to a screen for adding hosts.
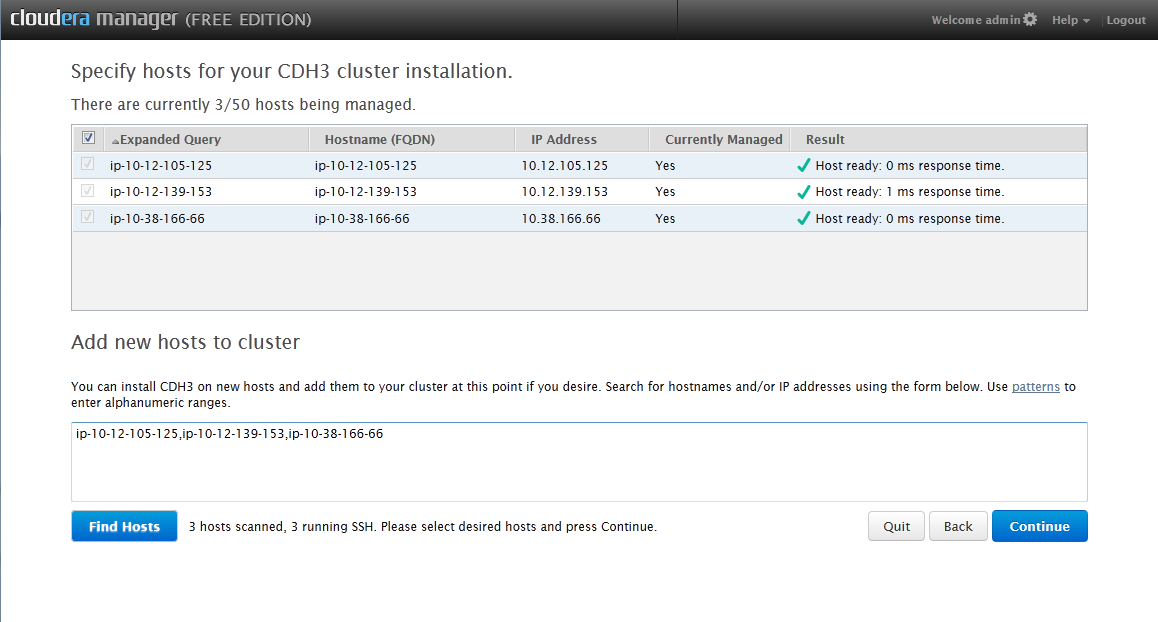
Select addresses
You can put a comma deliminated list of ip addresses or hostnames you want to be in your cluster and hit find hosts. You will be greeted with a list of the machines you can add to your hadoop cluster. Select each node you want and hit continue. (Your window will look slightly different to mine because I have already added these servers).
| Info |
|---|
For EC2 deployments, you can add the publicly addressable hostnames or the private hostnames or IPs (but not the publicly addressable IPs). This is because the internal IP addresses are used by the installer (but the public hostnames resolve to the internal IPs from within the Amazon cloud, where the installer runs) |
 thth
thth
Authentication
The next screen allows you to select authentication methods:
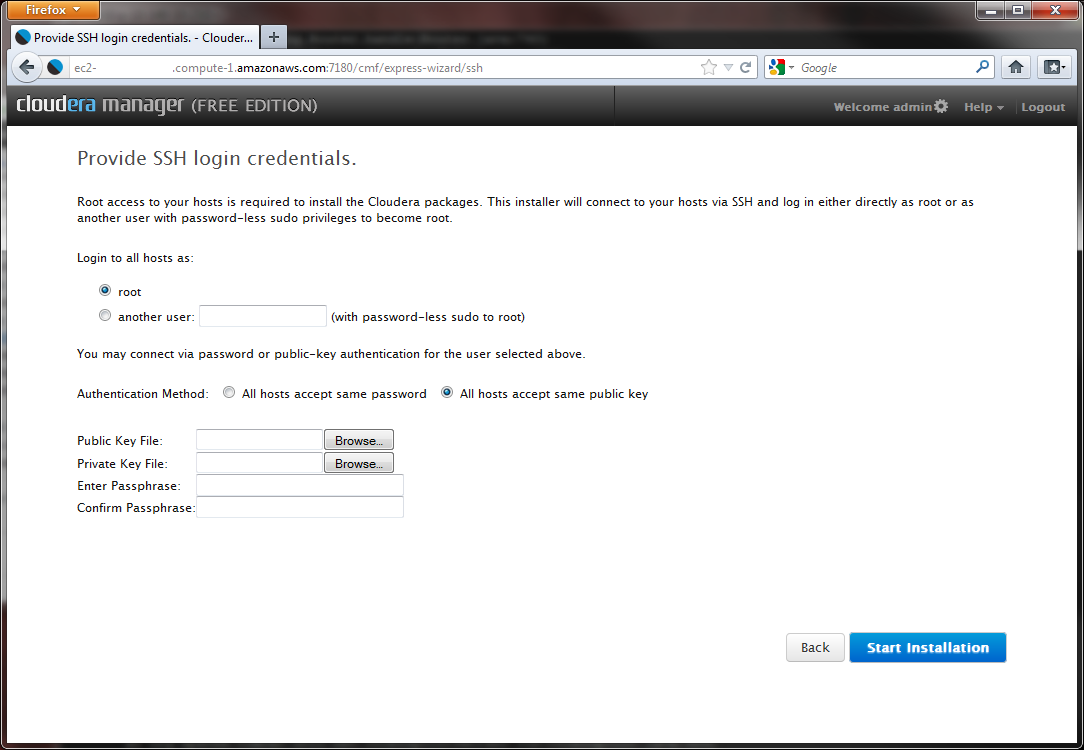
The exact configuration will depend on your platform:
- If you have a set of machines with the ability to log-on as root (or a different user who can sudo to root without a password), select "All hosts accept same password"
- More normally, you will have an ssh key to allow password-less login.
- In the latter case, upload the SSH public and private keys
| Info |
|---|
For Amazon EC2 deployments, the "All hosts accept same public key" must be used. The key downloaded from Amazon are RSA private keys. PuTTy (or more specifically Puttygen) is the easiest way of extracting the 2 (public and private) components. This is described below. |
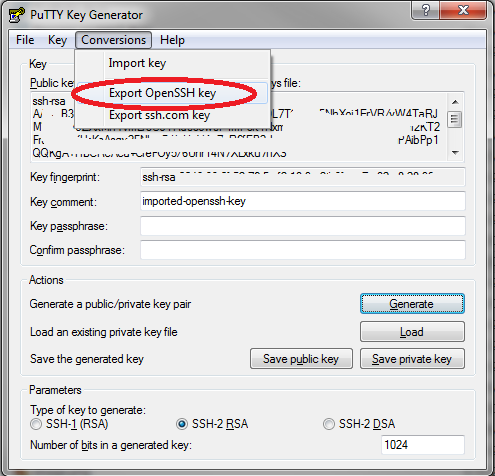
For keys in RSA format, download PuTTy and perform the following steps:
- Launch PuTTygen, the PuTTy Key Generator, from the install directory of PuTTy.
- Select File -> Load Public Key, and load the RSA key in question.
- Select Conversions -> Export OpenSSH key and save the private component (see screen capture below)
- Select Save public key (see screen capture below) and save the public component
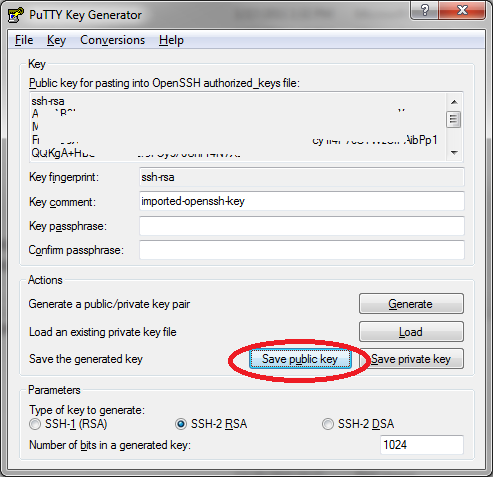
Finally upload both these files to the web form shown at the top of the section, and select "Install".
Installation
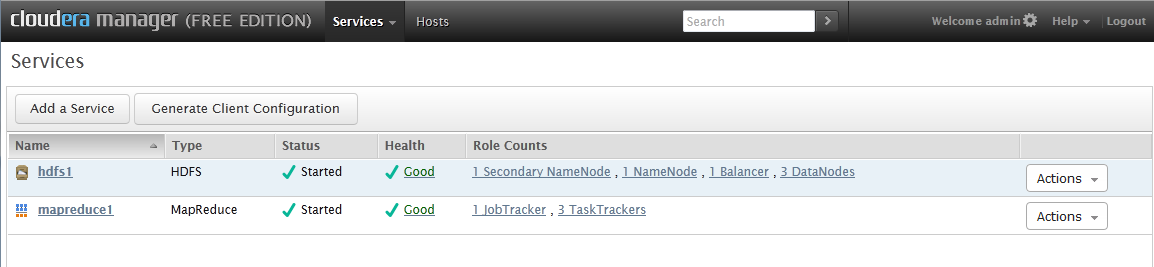
On the next screen select the basic install ("Core Hadoop"), which includes Mapreduce, Hue, HDFS and follow the prompts. Once everything is installed you should come to a screen that looks like this:
Post install configuration
There are some recommended configuration settings that Ikanow suggests changing before using the API server. These are optional (you can skip down to Generating Client Configuration if you want to get started with the default settings.
...
- Number of tasks to run per JVM (mapred.job.reuse.jvm.num.tasks) to -1
- Use Compression on Map Outputs (mapred.compress.map.output) to false (uncheck the box)
- Maximum Number of Simultaneous Map Tasks to 2
- Maximum Number of Simultaneous Reduce Tasks to 1
After you make these changes if you making these changes, navigate to Instances (from the toolbar at the top of the page), the task trackers will show as having "outdated instances". Select them all and restart them.
Then go back to the main screen (click the Services cookie at the top or the cloudera manager header in the top left).
Here we need to click the button Generate Client Configuration which will download a zip file. Open this zip file up and put the folder somewhere locally that you can find easily. The files in this folder need to be moved to the configuration folder on all the nodes. The configuration folder is by default set to /mnt/opt/hadoop-home/mapreduce/hadoop/.
The files in the folder usually include: core-site.xml, hadoop-env.sh, hdfs-site.xml, log4j.properties, mapred-site.xml, README.txt, ssl-client.xml.example. Just transfer all these files into the folder.
...